|
How to prevent an IP leak with Comodo Firewall
Posted by Max Biggavelli on 10 December 2013 08:37
|
|
|
As in our other KB article for Windows firewall, we describe again the black-whitelisting method but this time for Comodo firewall. Again, we go take the most "paranoid" and safest approach and disallow ALL Traffic, except the one specifically going through OpenVPN!
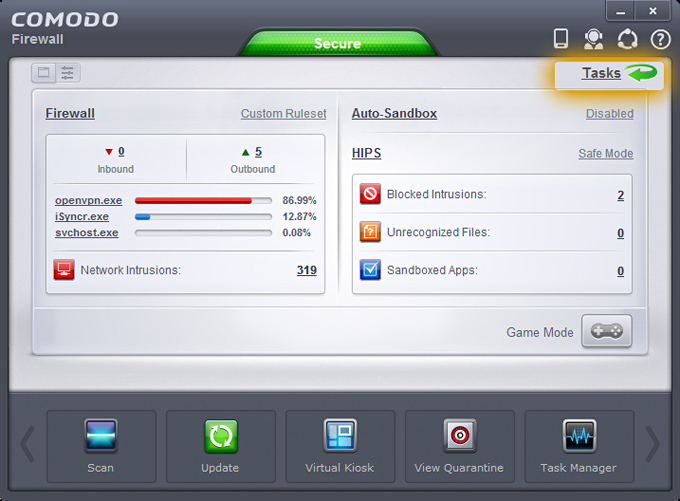
2. After install, we start it directly and set the firewall mode to "Custom Ruleset" and click on "Tasks"
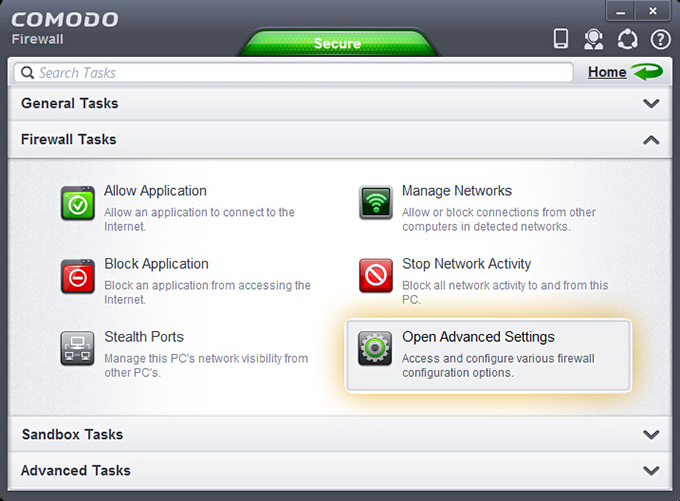
3. Under Firewall Tasks click on Open Advanced Settings
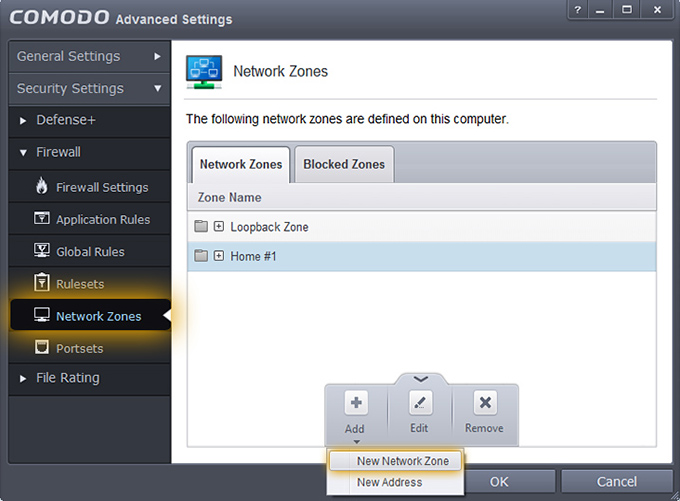
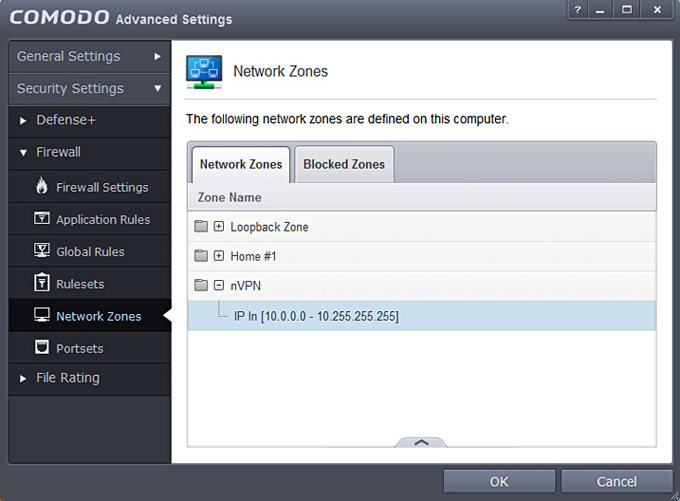
4. Go to Security Settings > Firewall > Network Zones and click on Add then choose New Network Zone and in the opening Window type "nVPN" and click OK.
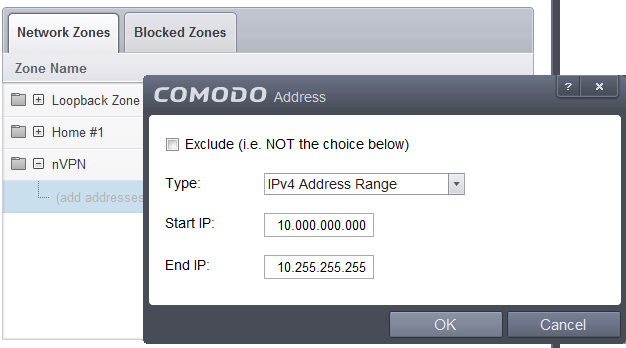
5. Now after this new zone is created, we select the nVPN zone and right click to open menu, Add -> New Address
6. In opening window choose IPv4 Address Range and type in as shown and click OK: Start IP: 10.000.000.000
7. Next state is as follows
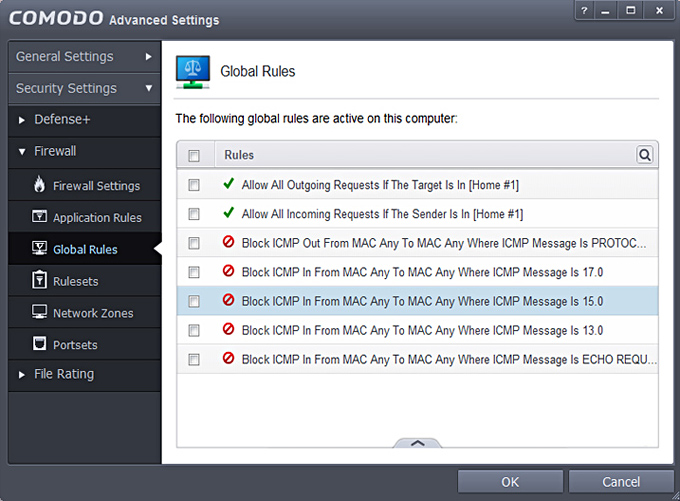
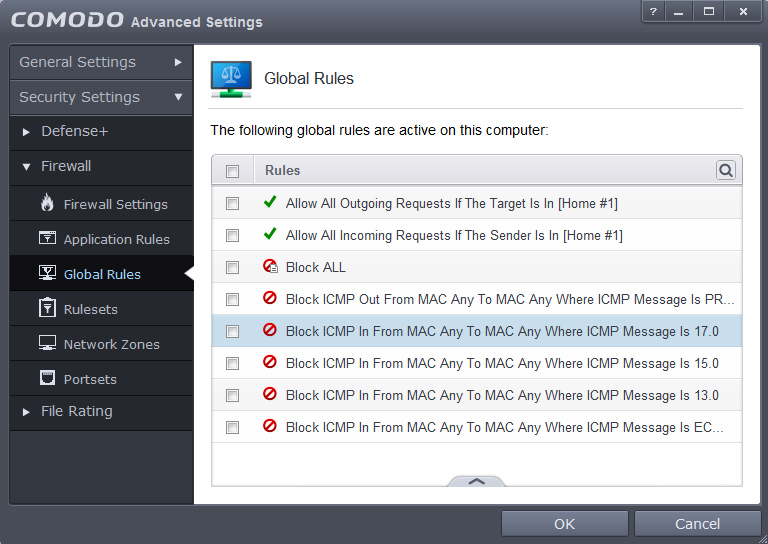
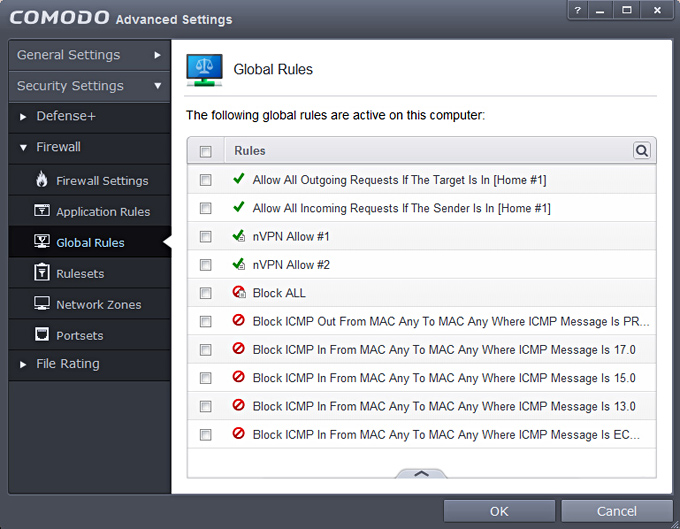
8. We click on Global Rules now which is the part responsible to block ALL Traffic and only allow Whitelisted definitions. Screenshot shows how it looks after a fresh Comodo install, inside there slide up the panel and click on Add.
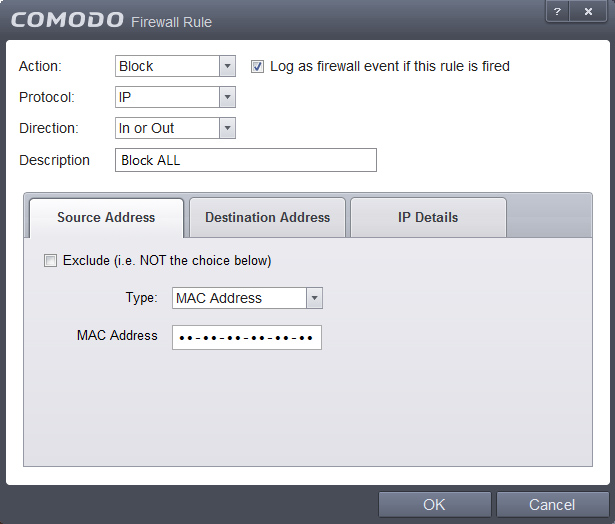
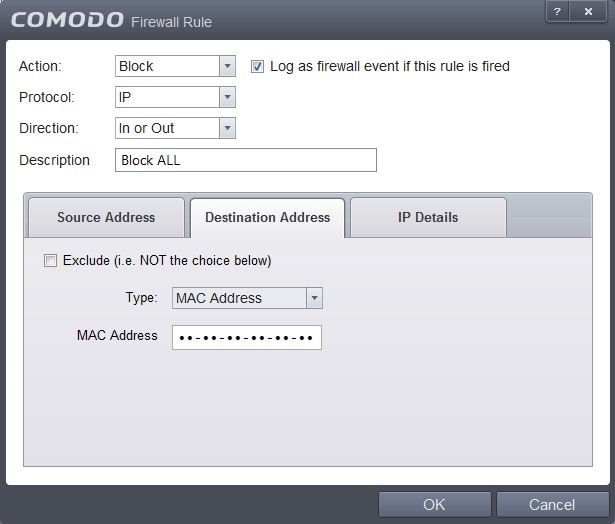
9. For the "Block ALL" rule, we disallow all Traffic, like shown: Source -> Mac Address, Destionation -> Mac Address, IP details: Any
Once you have identical settings, click OK.
10. Should look as below now.
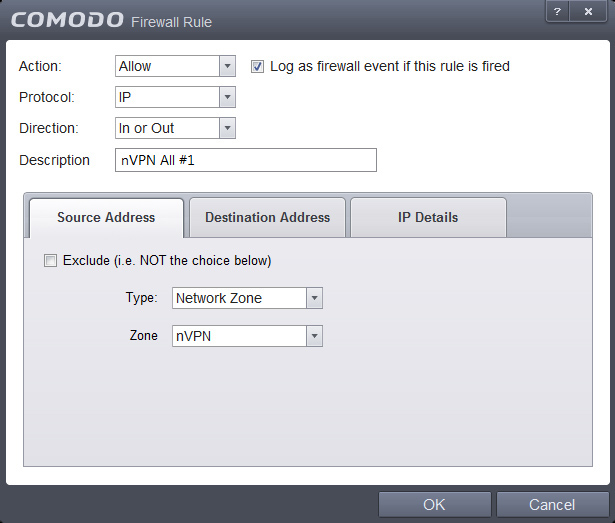
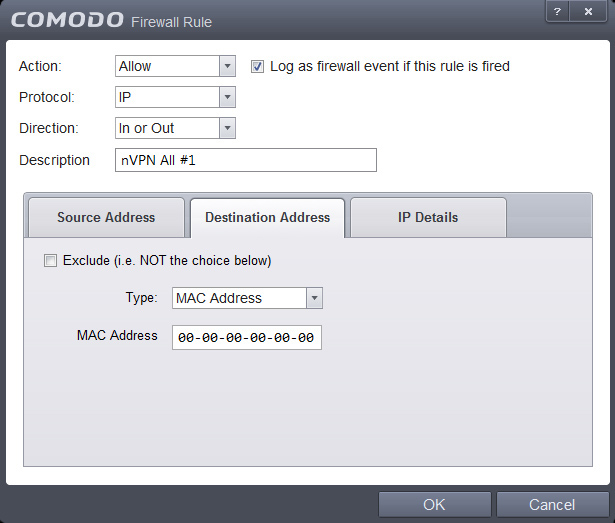
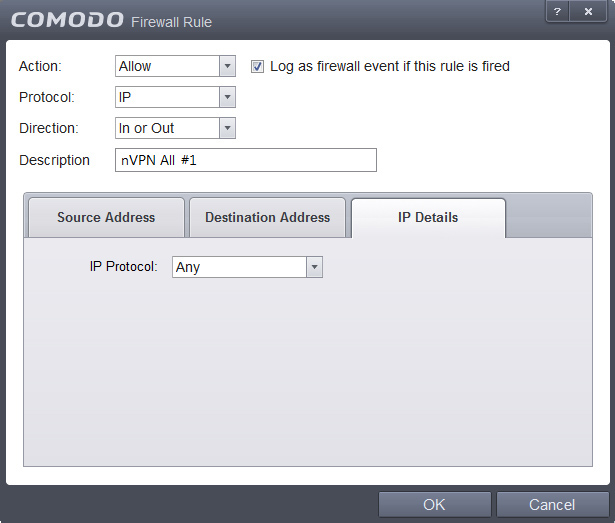
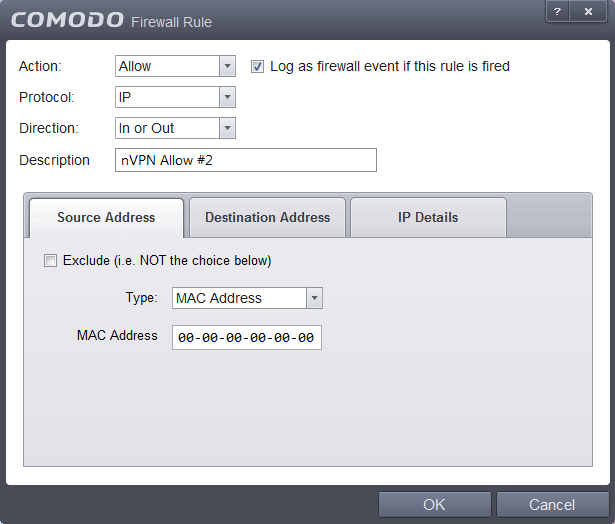
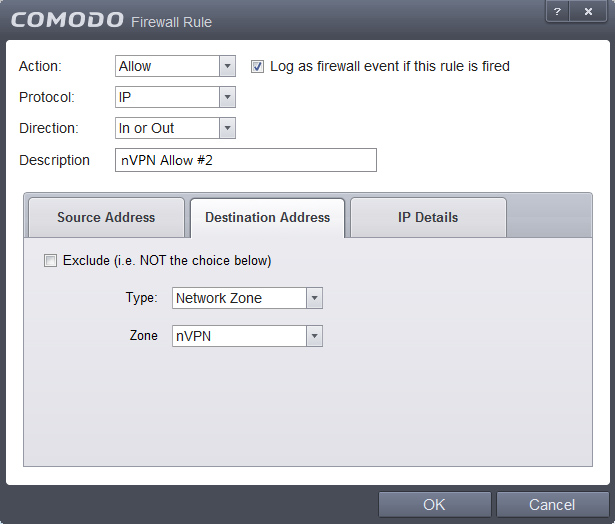
11. We add two other rules now, which will be the "Whitelist" rules, so those are rules which define what we want to explicitly allow. Open the small panel, click on Add follow the screenshos and hit OK when finished.
12. Current state should look as follows now, incase not then open the panel and move the rules up/down into an identical order. Important: Firewalls work in a hirarchical structure, so from TOP to BOTTOM manner, therefore (in our whitelist to blacklist scenario) rules to allow, must always be added BEFORE (higher) than the Block ALL rule!!
This tree shows the concept, we allow first with nVPN Allow1+2 rules and everything else after is disallowed by the Block ALL rule.
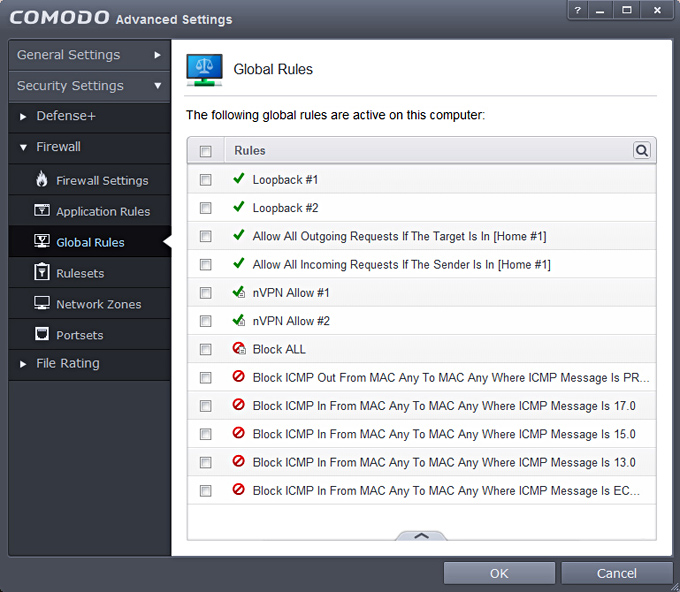
13. We proceed and add 2 more rules for the already existing zone named Loopback (IP range: 127.0.0.1 - 127.255.255.254) screenshots wont be needed anymore, by now you should understand how it works. Click Add and choose:
Source Address: Network Zone -> Loopback Zone
Source Address: Mac Address -> °°-°°-°°-°°-°°-°°-°°
14. Make sure current state is exactly as below, incase not move the rules up/down accordingly to receive an identical structure.
15. Finally click on OK now to activate the rules! Additionally, go ahead and verify that the Firewall is actually activated AND set to "Custom Ruleset". Lets test all this work, start your desired browser and you should notice no websites are loading, everything is dead (atleast if you are NOT connect to the VPN yet). Proceed and Connect with OpenVPN now and once the VPN connection is established, browse again to a website and you must see some life, which means our whitelisting rules from step 11-12 come to affect! When being on the VPN you can simulate a disconnect scenario, simply disconnect from OpenVPN and check traffic flow, everything will be cut off again immediately, exactly how it should be. | |
|
|
Knowledgebase: Securing VPN & DNS


Terms of Service | Copyright ©2023 nVpn. All rights reserved