|
How to use our IPSec RSA (IKEv2)
Posted by Max Biggavelli on 25 September 2014 00:35
|
|
|
[+] IKEv2 is light on bandwidth and faster [+] IKEv2 is more compatible and portable in many aspects [+] IKEv2 provides inbuilt NAT Traversal [+] IKEv2 has inbuilt tunnel liveness checks, if tunnel is broken down on peer, it has facility to detect and re-establish the tunnel [+] IKEv2 provides comprehensive authentication capabilities. It provides EAP authentication and hence it is suitable to integrate with existing authentication systems in Enterprises [+] All versions of Windows since 2000/XP and Mac OSX 10.3+ have built in support for IKEv2 (yes, even Windows 10) [+] Fast speed even while traffic still being encrypted (latest tests show slightly/notably better speed results compared to OpenVPN UDP and even more so over TCP!) [+] Supports Portforwarding [+] IPsec is a known secure standard and has shown no known critical vulnerabilities when used in conjunction with AES [+] Using a mobile device with iOS (iPhone) or Android it is the fastest to setup and configure, as it is supported natively (no additional software required to install) [+] IP change and Encryption for ALL Applications
[-] None yet..
Hostname: uXXXXX.nvpn.to (your uXXXXX.nvpn.to hostname you can find in your .ovpn config file)
Windows Vista/7/8/10 Certificate setup procedure Instaling the required "client.p12" Certificate *german version* (english version here):
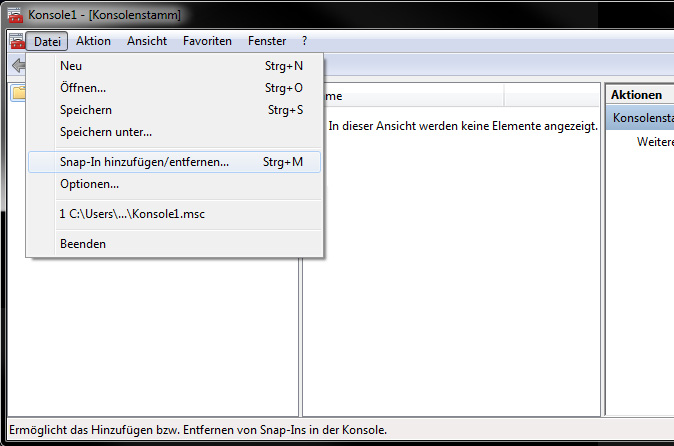
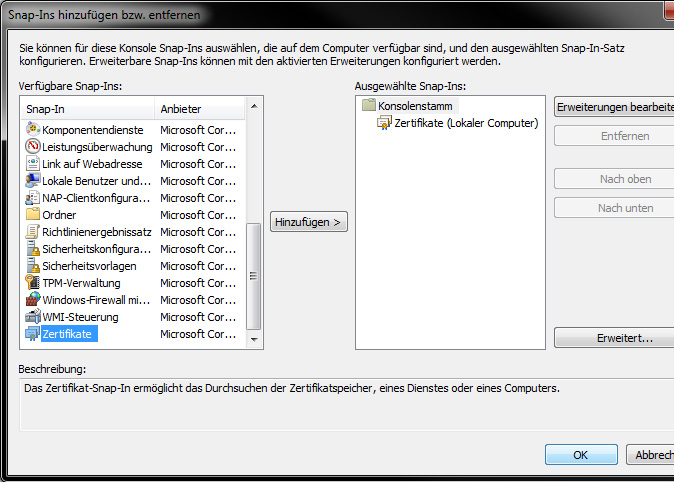
2. Click on File -> Add snap-in / remove .. (or simply do CTRL + m)
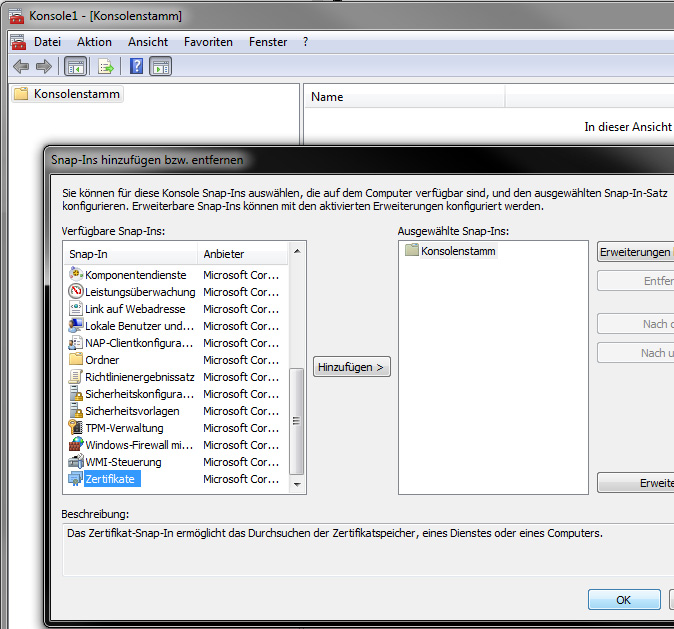
3. Choose "Zertifikate" and double click it
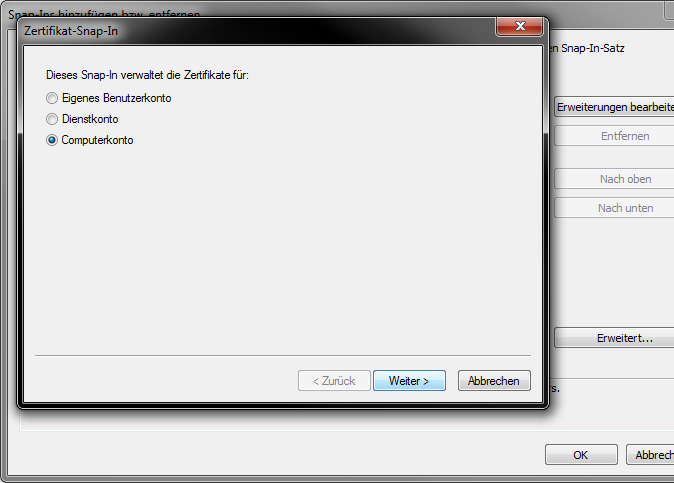
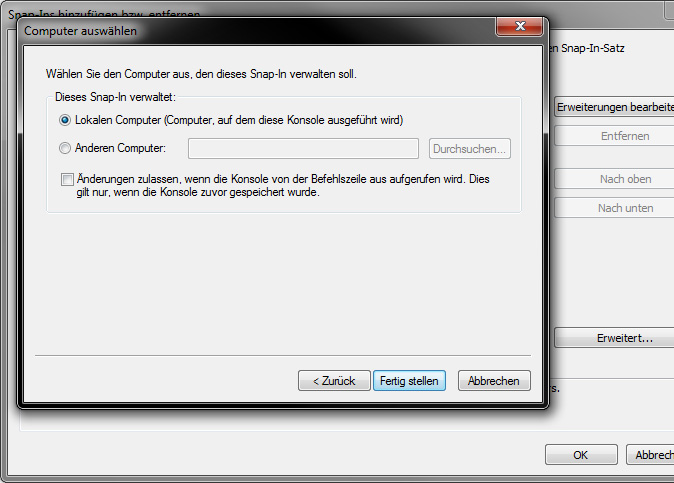
4. Choose "Computerkonto" and click weiter, in next window keep all as it is and click Fertig stellen
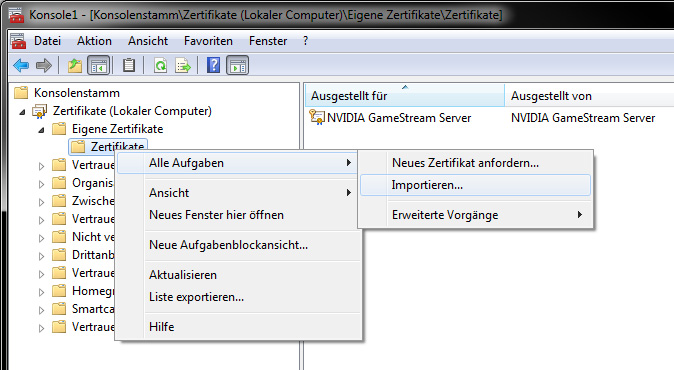
5. Open the "Certificates (Local Computer)" -> "My Certificates" -> "Certificates" and there click on Import
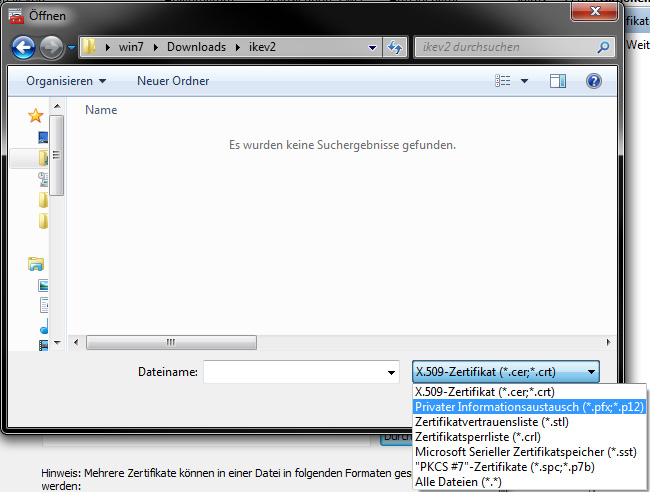
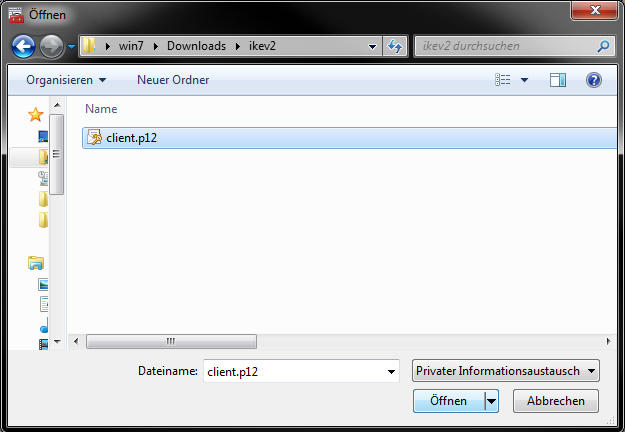
Choose the location of the Certificate "client.p12" file (i created an ikev2 folder in Downloads only for presentation purposes) now choose "Privater Informationsautausch *.pfx; *.p12" so you can find the file.
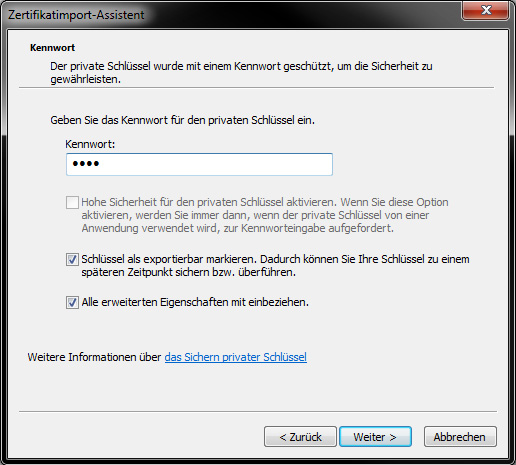
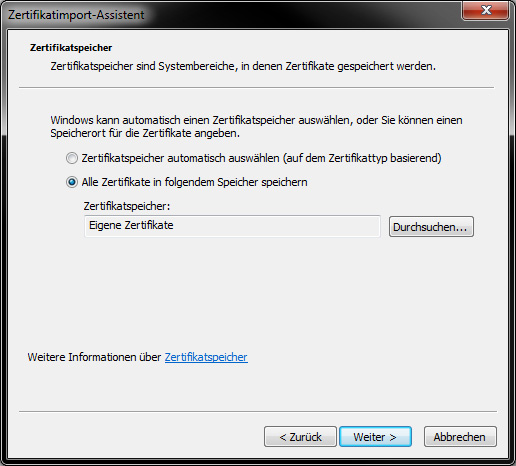
In next window do everything as shown below and use as password: nvpn
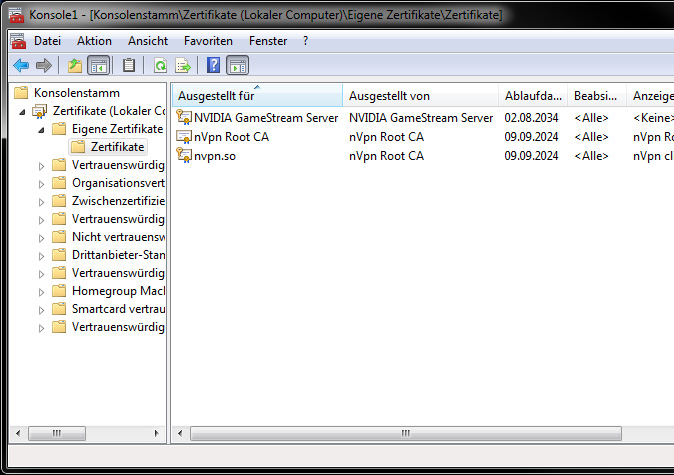
Now finish the import wizard and your window must look the same as below! We see two certs "nVpn Root CA" and "nvpn.to"
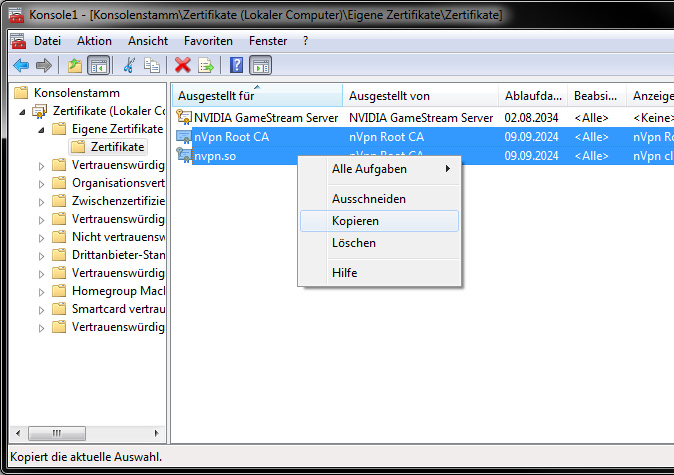
Now important: As next step we need to copy these two files into "Vertrauenswürdige Stammzertifizierungsstellen" as well, so select the two files and make a COPY.
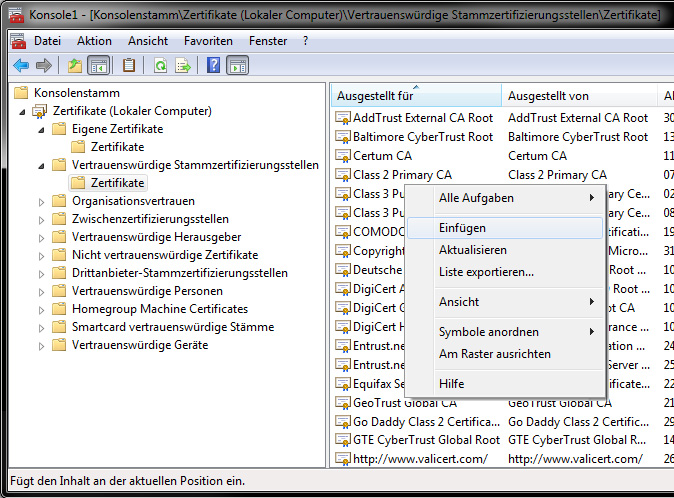
Open the " Trusted Root Certification Authorities " -> " Certificates " tree and there choose "Insert"
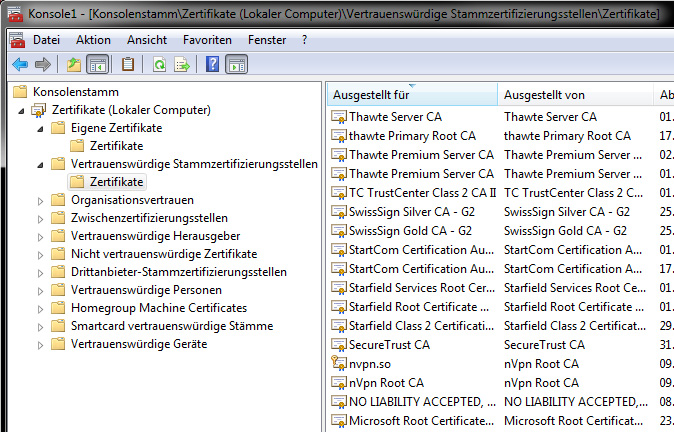
Verify that the two files are showing up
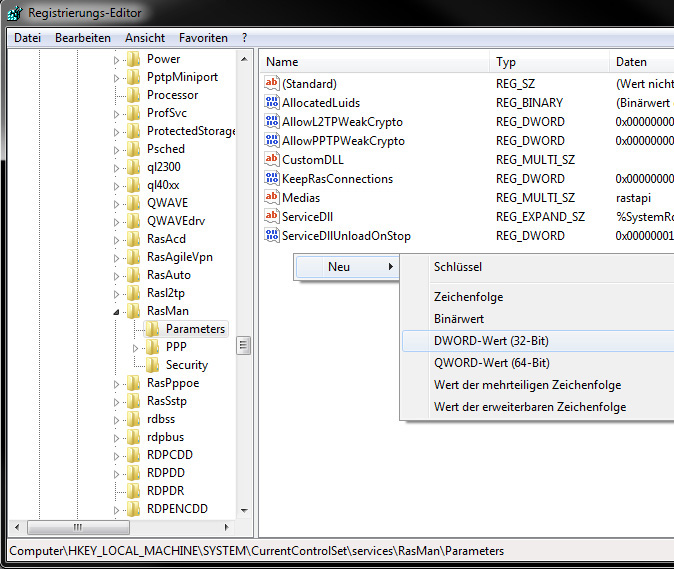
6. The import of the required certificates is now finished, we proceed to the next important step in where we have to edit a registry key and add a new DWORD value, so open your registry now: "Windows Start button"
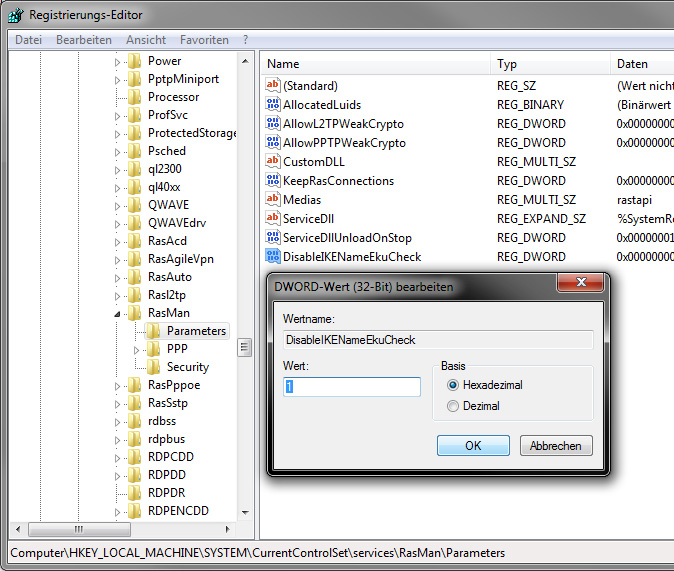
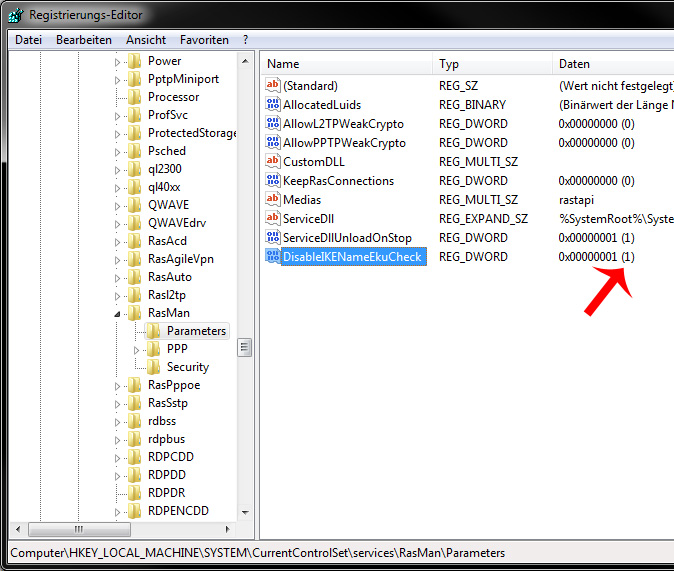
Verify that everything looks as below, so that "DisableIKENameEkuCheck" exists and that its value is "1"
Important note: Windows 10 in its current state has bugs (latest build tested: 10240) with IKEv2, if you use the "normal" setup method your IP will NOT change!
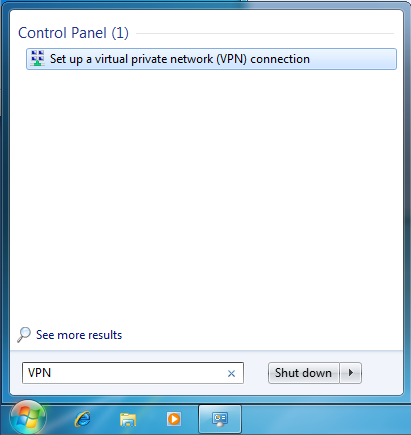
Step 7.1 (Windows vista/7/8) If everything is done we proceed to the L2TP/IPsec IKEv2 connection settings. Click on the Start Menu and type “VPN” into the search box.
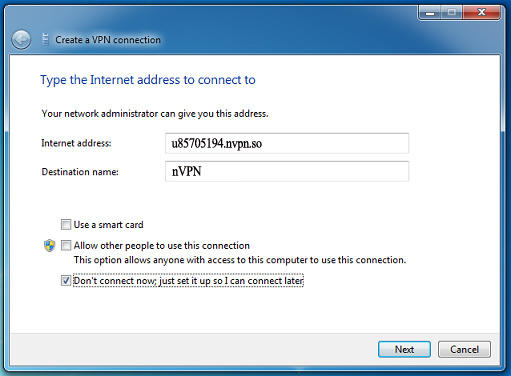
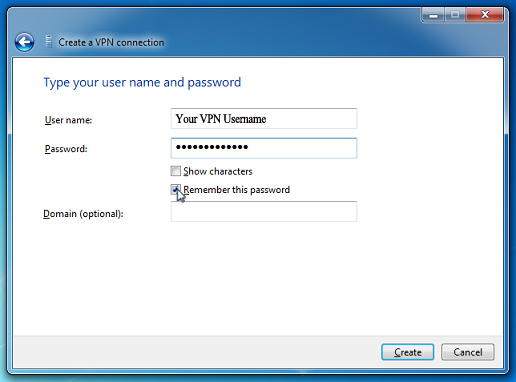
Enter your unique "uXXXXXX.nvpn.to" hostname in the Internet address field (you find your DNS hostname in your .ovpn config file!!) and set as Destination name "nVPN" for example. Lastly, make sure that the checkbox labelled “Don’t connect now; just set it up so I can connect later” is checked. Then click the “Next” button.
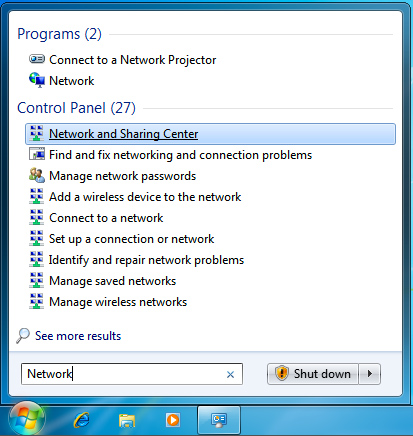
Click on the Start Menu, type the word “Network” into the search box, and click on “Network and Sharing Center”.
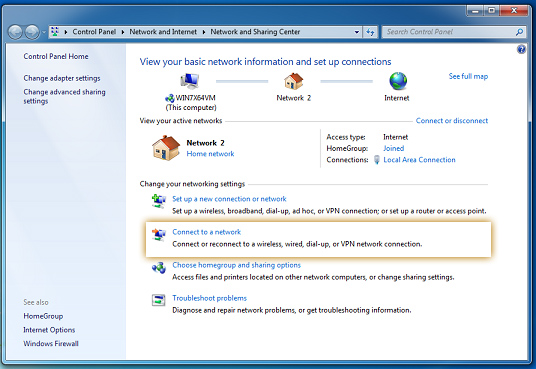
When the Network and Sharing Center opens, click on “Connect to a network”.
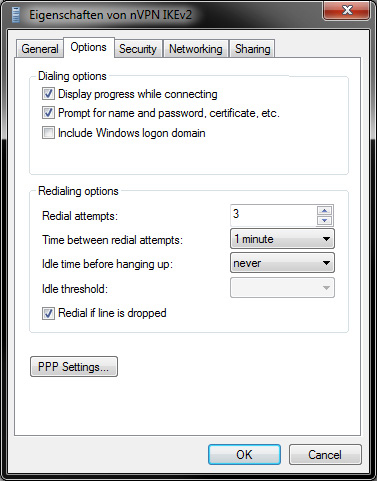
When you click on “Connect to a network”, a list of Connections appears. Right click on the “nVPN” connection and choose “Properties”. Go to options tab and make sure to DISABLE the "Include Windows logon domain" (in german: "Windows Anmeldedomäne einbeziehen") exactly as shown below!
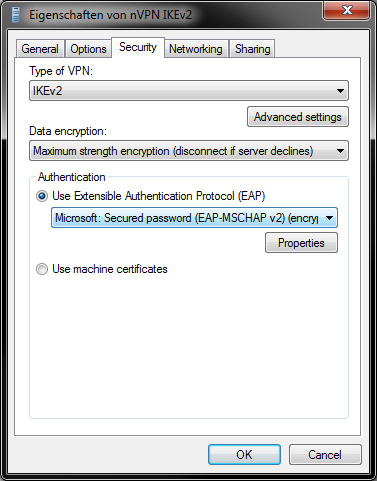
Hover to Security tab and choose as type "IKEv2" and choose "EAP-MSCHAP v2"
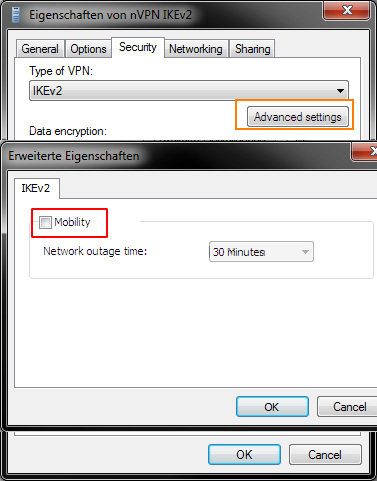
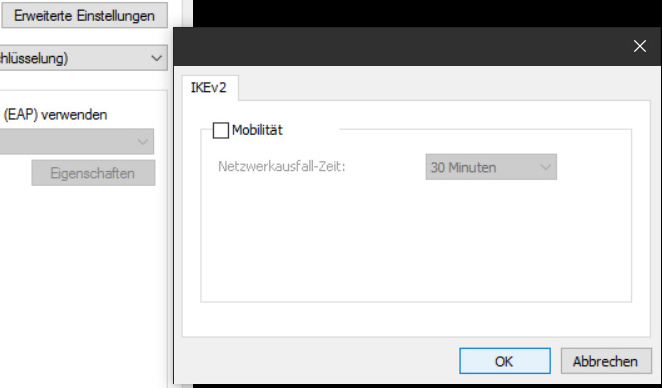
Click on Advanced settings and DISABLE the Mobility check
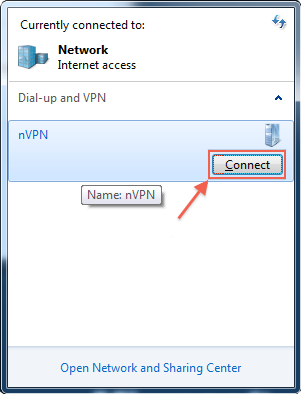
Thats it for the settings, finally time to connect! Again we go to "Connect to a network" and "nVPN" will be showing up in the connection list. Click on "Connect".
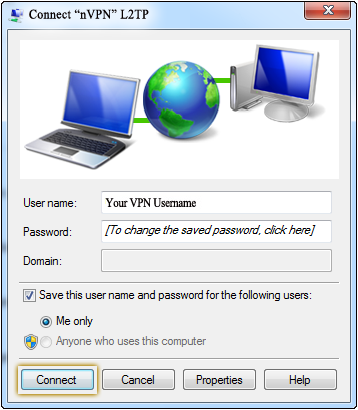
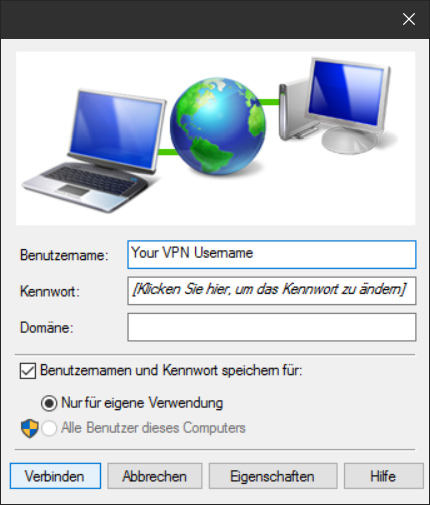
Click on "Connect" like shown in both panels and thats it!
Setup for Windows Vista/7/8 is at this point finished, after the successful connect, verify your IP change here: http://check.nvpn.net
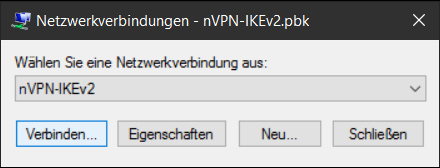
Download following file and place it on your Desktop nVPN-IKEv2.pbk (Important: use "Save Link As.." and save it on your desktop) Go to your desktop and double click on this "nVPN-IKEv2.pbk" file:
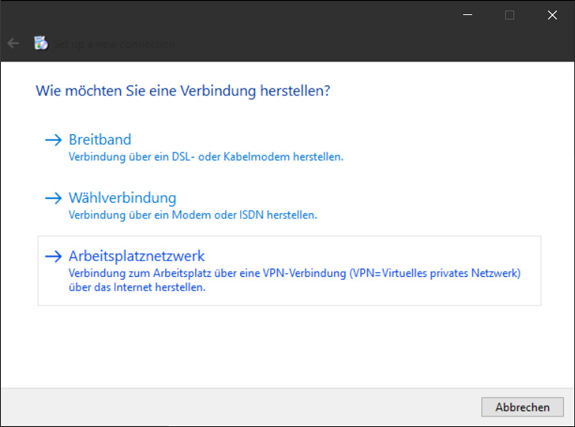
a new Window appears, click OK: Select " Work network ":
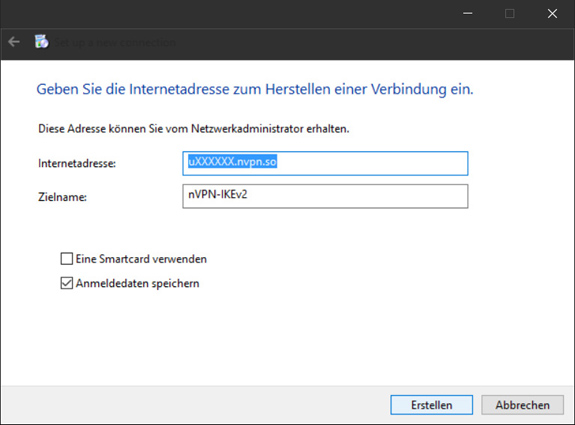
Enter your unique "uXXXXXX.nvpn.to" hostname in the Internet address field (you find your DNS hostname in your .ovpn config file!!) and set as Destination name "nVPN-IKEv2" for example. Lastly, make sure that the checkbox labelled “Save login” is checked. Then click the “Erstellen” button.
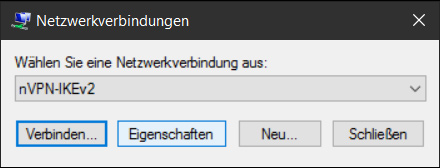
Click " Properties "
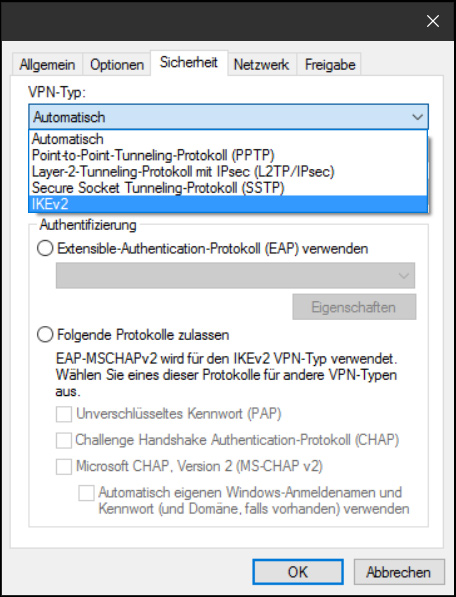
Hover to the "Sicherheit" tab and select "IKEv2"
Click on " Advanced Settings " and disable " mobility ":
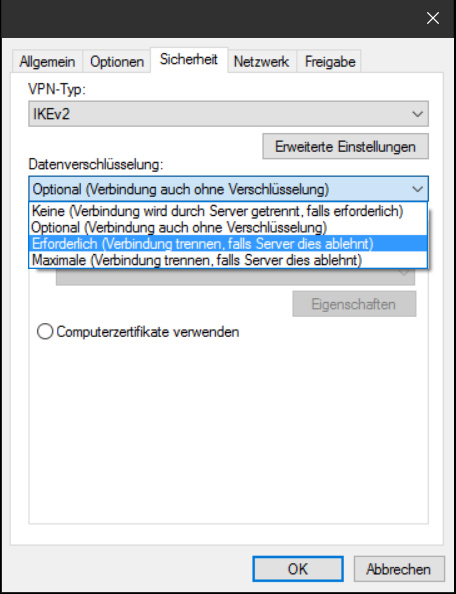
Select data encryption and select " Required (disconnect if server declines)"
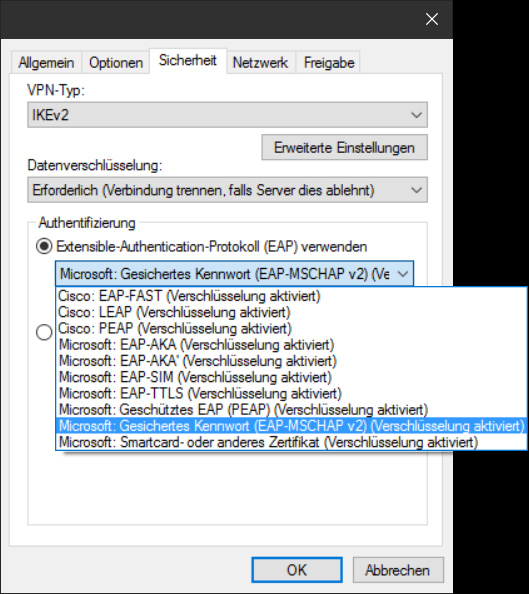
Under Authentication select " (EAP-MSCHAP v2) (encryption enabled)"
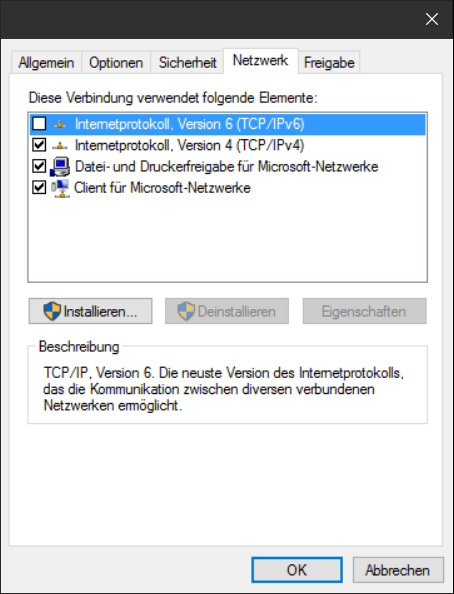
If you dont use IPv6 make sure to disable it, otherwise keep it activated:
If everything completed, click on OK and start to connect:
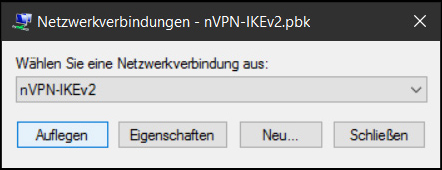
"Auflegen" means you are successfully connected to IKEv2, verify the IP change here: http://check.nvpn.net
Open your Network Preferences, click on the [+] sign and choose "VPN", "Cisco IPSec" and name it "nVPN - IKEv2". Server Address: uXXXXX.nvpn.to (your uXXXXX.nvpn.to hostname you can find in your .ovpn config file) Confirm your settings and click on "Apply", now click on "Connect".
We have developed our own custom coded IKEv2 client for Android (it sports OpenVPN and a kill switch for both as well), all you have to do is visit this link and install it: https://nvpn.net/tools/android/nVPN-2.5.apk
Setting up IKEv2 on on iPhone/iPad (iOS): For iOS there are two ways to connect: one being the older "Cisco IPsec" and the other being the pure "IKEv2" profile approach, where the "IKEv2" Profile approach is the most modern, recent and preferred way.
Important: below steps only work using the Safari browser, it does not work with Chrome browser or similar, so make sure you use the Safari browser for the next steps. Now reaching out to your iOS device of choice, first of all you will need to log into the members area now - its really important being logged into the members area first! (Incase the login mask for the members area keeps reloading, make sure to copy & paste in your Username and Password rather quickly into the login fields, the Captcha is pretty quick to disallow members area login). Once successfully logged into the members area, visit the following link: https://nvpn.net/memberss/ikev2.php Now you will find a Download link for the "nvpn-ikev2.mobileconfig" file, click on it. iOS will prompt you to install the IKEv2 Profile now, allow all installation steps and afterwards head over to the "VPN" section and click on "Connect". A password prompt appears, enter your nVpn account password and thats it, you are connected to the VPN now.
From your Home screen go to "Settings" -> "General" -> "VPN" -> "Add VPN Configuration" -> "IPsec" Description: nVPN (IKEv2) To connect, save it and activate the "nVPN (IKEv2)" connection.
Setting up IKEv2 on Linux Ubuntu 16.04 LTS (or older), or CentOS 6 (64 Bit): To setup nVpn IKEv2 on Linux with Ubuntu (Debian should also work), or CentOS 6 we have created an automated setup script, the script was tested with CentOS 6 and Ubuntu 16.04 LTS, but should work on lower version numbers too (Ubuntu 17 doesn't yet!) Follow the steps below for setup, log in your server and on the command line do following: 1. Download the setup script: wget https://nvpn.net/tools/ikev2_linux_setup.sh 2. Give the script executable permissions: chmod u+x ikev2_linux_setup.sh 3. Start the script now: ./ikev2_linux_setup.sh 4. You will be asked you to enter your Username and Password. Script will automatically install all required packages and once completed automatically connect to IKEv2. 5. And for the future to connect, or disconnect from the VPN use either or of the two commands below. Ubuntu / Debian:
CentOS 6:
| |
|
|


