|
How to prevent an IP leak on Mac OS with Little Snitch
Posted by Max Biggavelli on 03 April 2016 15:19
|
|
|
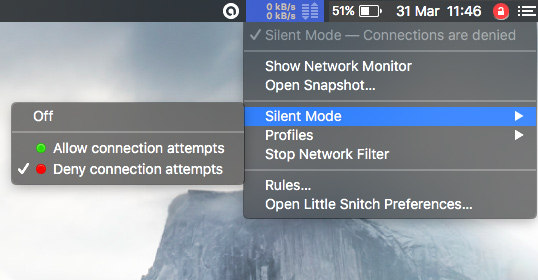
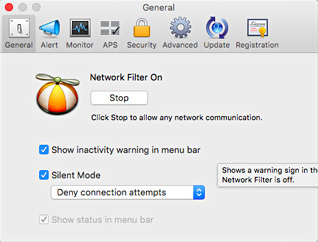
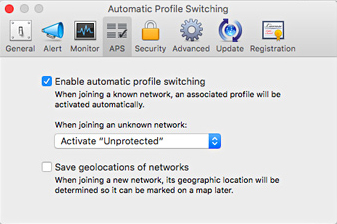
This article describes a method how to prevent exposing your real IP incase of an unplanned VPN disconnection, or similar events, by using the Little Snitch firewall for Mac OS. Little Snitch is a firewall that allows you to control connections from your computer to the internet. One of it's greatest features, introduced in version 3 is the “Automatic Profile Switching”: the ability to automatically apply different rules depending on which network you are connected to. We are going to use exactly this feature to provide unrestricted access to the internet when connected to the VPN, but otherwise automatically cut off all internet access! What we will achieve with "Little Snitch" is this sort of segregation, but only as an either or solution, as further described in this article. Either you access the internet with the VPN, otherwise all traffic is blocked (you could adjust this pattern to your preference in the long run on your own, though this article here describes the complete traffic block if not connected to the VPN only). 1). Go ahead download and install Little Snitch (I have paid for the license, im not sure whether the free version would be able to work as well). 2). Stop Network filter and switch on the Silent Mode to Deny Little Snitch has a tendency to be a bit verbose and will pester you with questions as soon as any application attempts a connection, which could eventually get annoying. Fortunately for us, there is a “Silent Mode” which will automatically allow/deny any connection and offer us some peace while we work on the configuration. So:
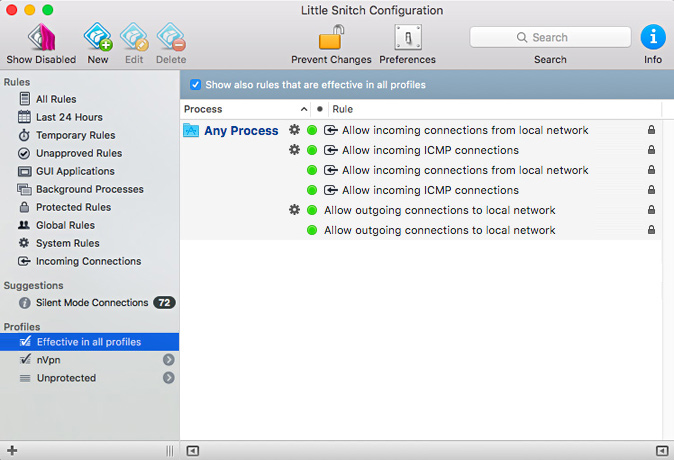
3). Delete all default Rules Little Snitch comes with a couple of default rules. They are mostly harmless, but if you are worried about privacy, it never hurts to be cautious. So let’s start off from an empty environment. Open the “Rules” screen and Delete (or disable) all the rules. You may get a few warnings, but just go ahead and do it anyway (you can always restore the factory defaults later). 4). Now, click on the "+" sign located in the left bottom corner and create two different Profiles, one for the VPN name it "nVpn" and another one for the insecure Traffic, name it "Unprotected"! 5). Let's go ahead and check the needed rules for each Profile: Effective in all profiles: only keep two main rules for a restrictive start.
When you are done, your rules should look like this:
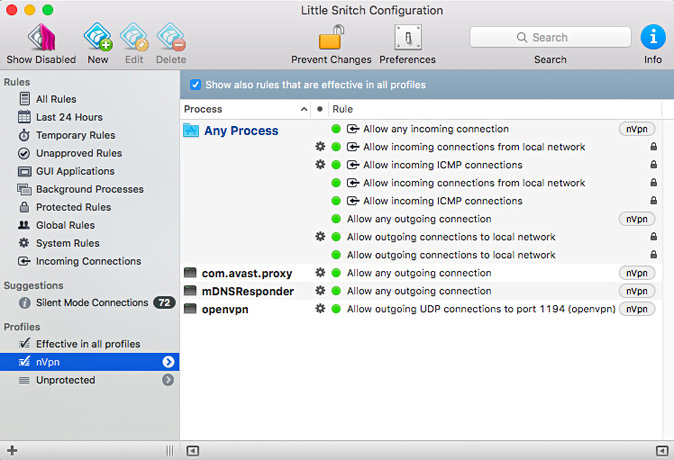
nVpn Profile: In my case..
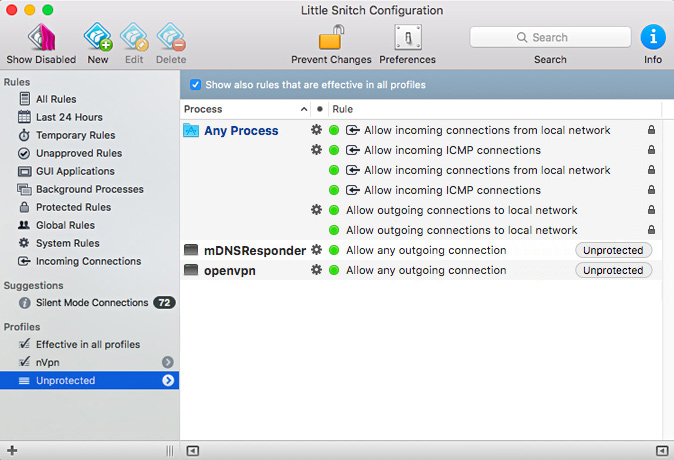
Unprotected Profile: as explained in the beginning in Unprotected profile all traffic is blocked, the only things allowed are ICMP (ping), Local network, DNS resolves and OpenVPN.
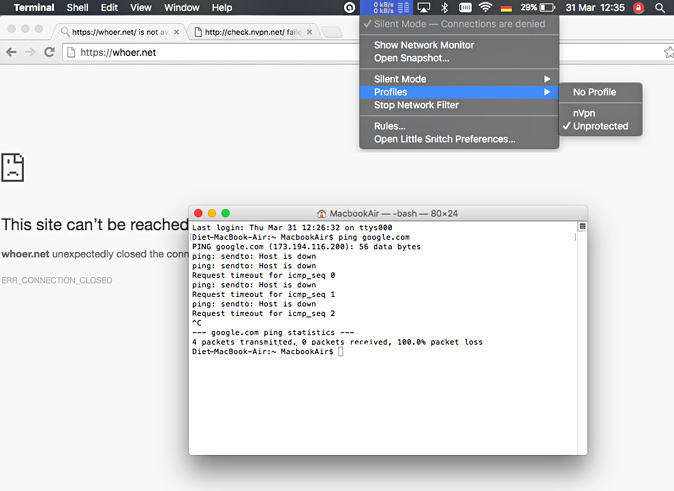
Because now Little Snitch notices the Network change (during WIFI off/on) it prompts you to choose a profile, there choose the "Unprotected" profile! Since the default rules do not explicitly allow any connection and we have additonally set “Silent Mode” to “Deny”, we basically lost all internet access:
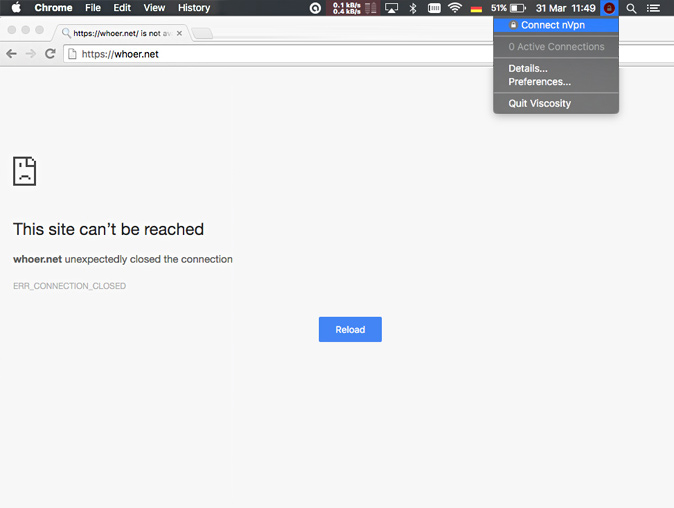
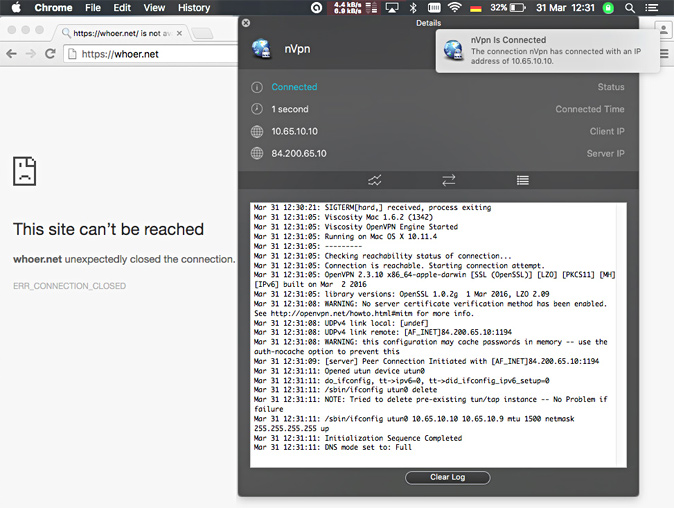
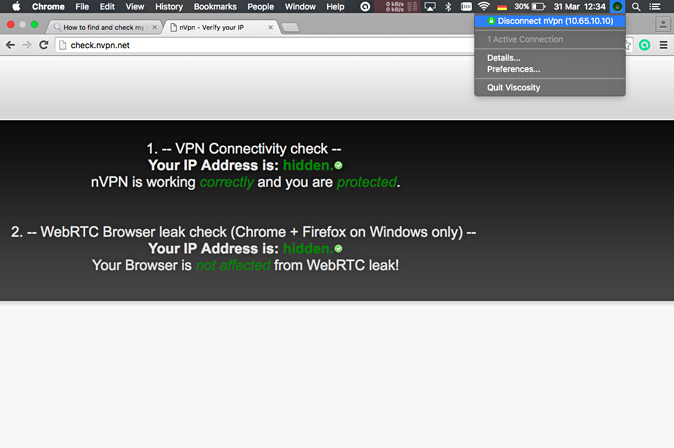
7). Good thats what we wanted for the start. Now connect to OpenVPN (we use viscosity for Mac OS here in this article, instead of Tunnelblick):
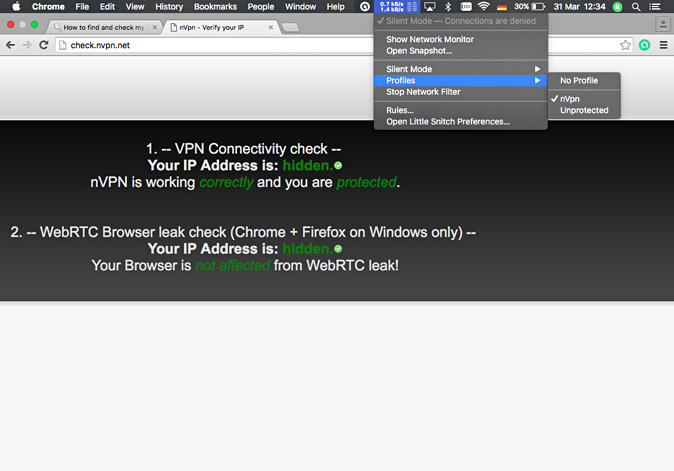
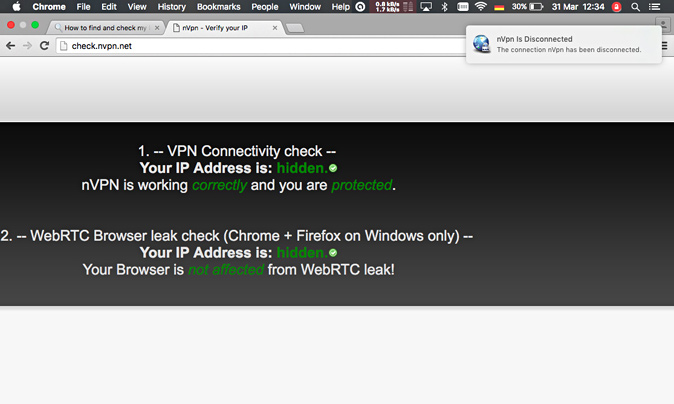
After the VPN connection gets established, you will be again prompted to choose a Profile and this time choose the "nVpn" Profile: Move ahead and verify whether browsing works, visit www.whoer.net or http://check.nvpn.net:
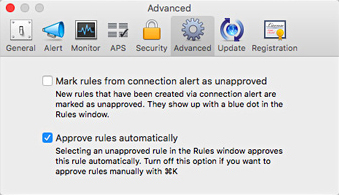
If browsing is possible on the VPN then its a good start, but below again compare the summary of the most important settings: Silent Mode: Denies all connection attempts by default Advanced:
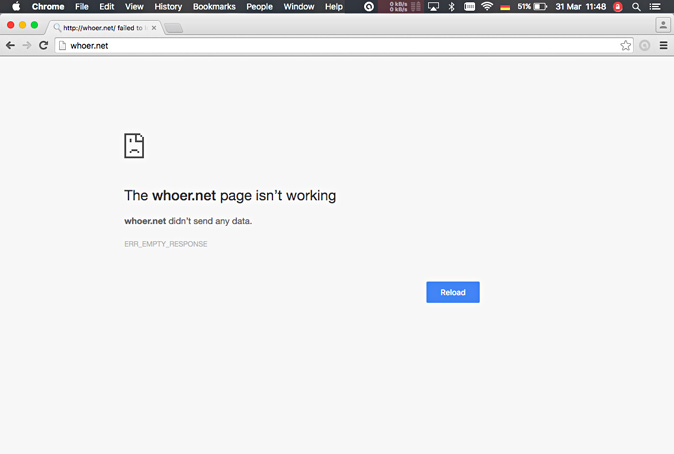
8). Disconnect from OpenVPN now and test whether the internet access is instantly blocked again. After disconnecting from the OpenVPN network, Little Snitch will fallback to the "Unprotected" where all internet access is blocked:
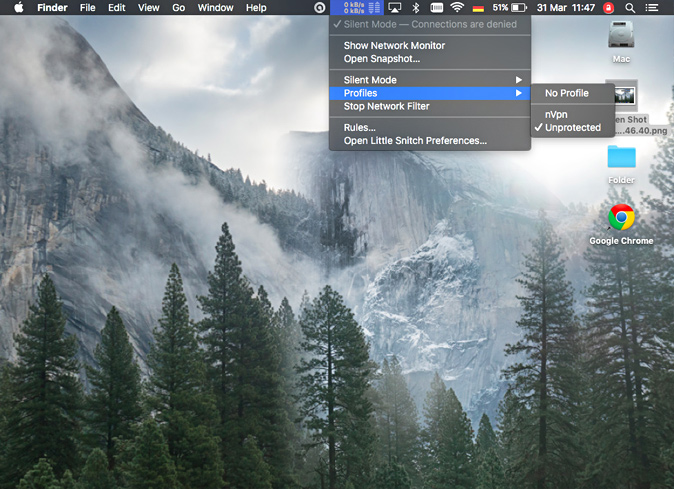
Since no VPN connection is active anymore at this point, make sure to verify the correct "Unprotected" Profile is chosen, because the currently used Profile should be "Unprotected" anytime when no VPN connection is active:
Now, every time you connect to a new network, Little Snitch will ask you to choose a profile and you can either choose the safe one ("nVpn"), or have all internet access blocked by using "Unprotected" Profile. | |
|
|

